

Code Generator Usage Guide
Package Creation Required After 2.5.3
Reference video: https://www.bilibili.com/video/BV1kv4y1g7nT?p=3
Code Generator
Click "Create code from existing database" at the top to select tables from the database and generate corresponding code.
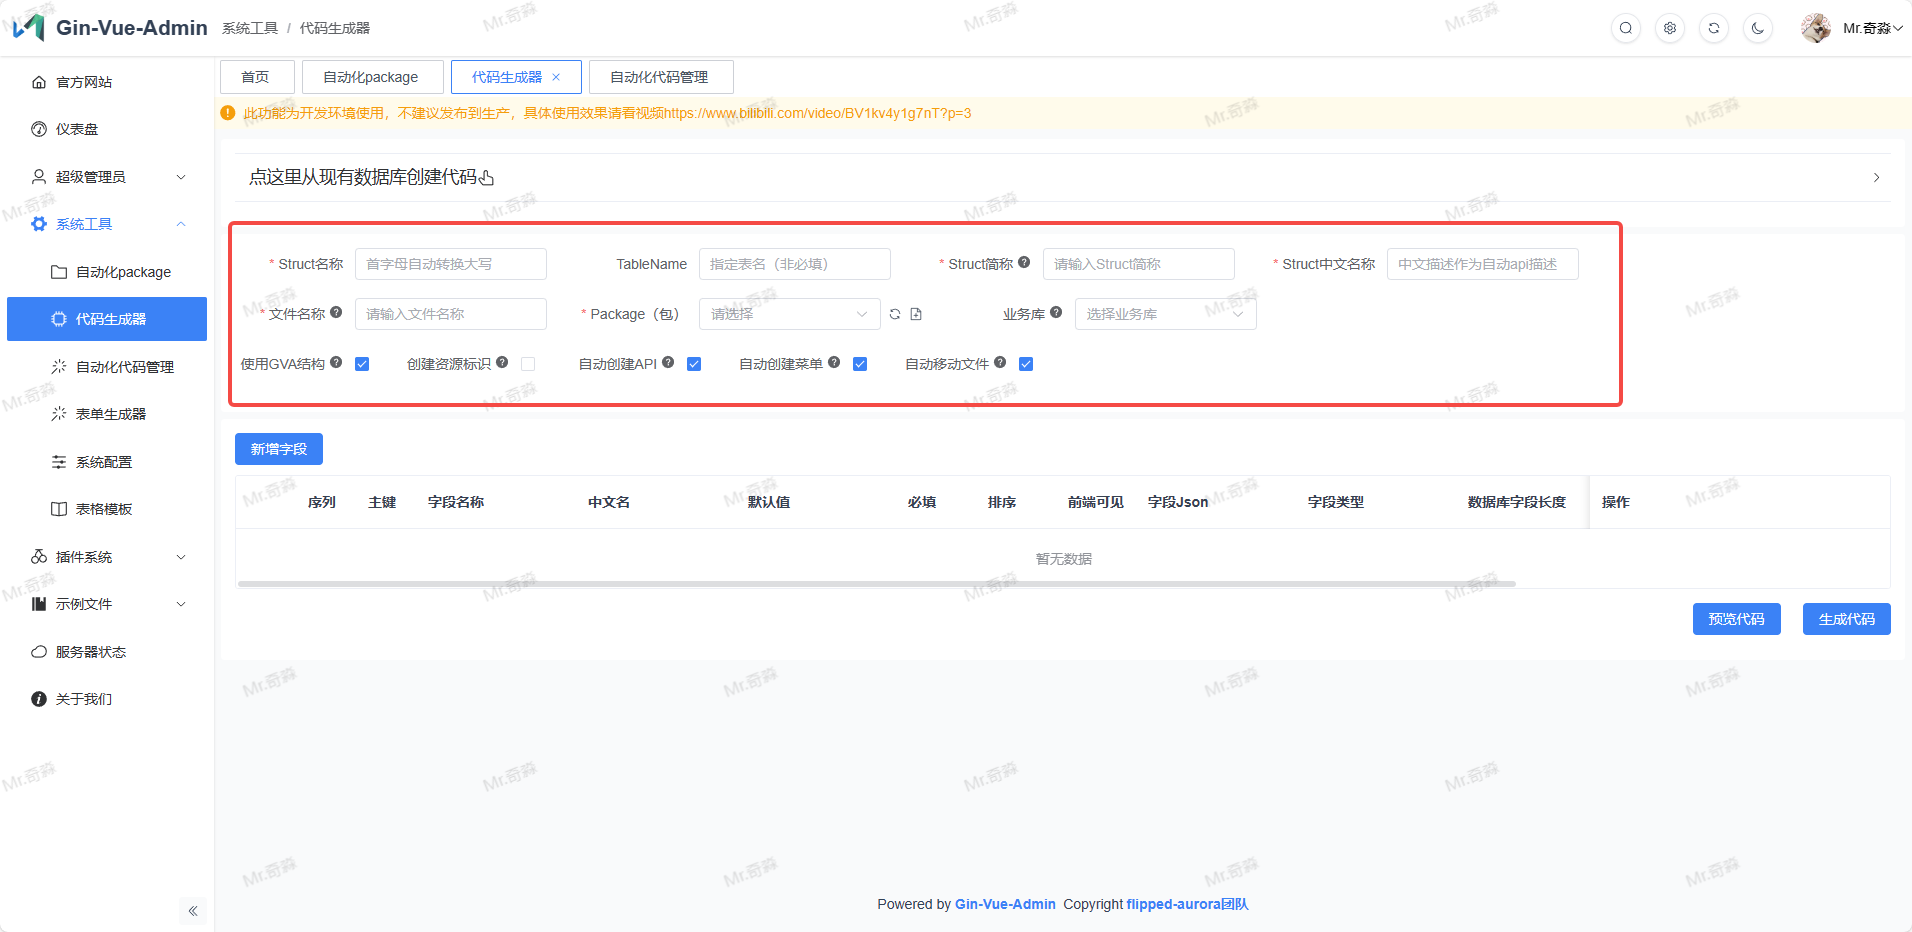
| Interface Name | Corresponding Generated Struct Name | Description | Notes |
|---|---|---|---|
Struct Name | StructName | Struct name | The struct name in the struct file under server/model folder, first letter must be uppercase. |
TableName | TableName | Specify table name (optional) | The data table name in the database corresponding to the struct. |
Struct Abbreviation | Abbreviation | Abbreviation will be used as parameter object name and route group | Used as the name when struct is used as parameter, and route group name. Generally corresponds to Struct Name but with lowercase first letter. |
Struct Description | Description | Description as automatic API description | Used as automatic API description, also the default menu name displayed in the left menu. |
File Name | PackageName | Default name for generated files | Use camelCase naming. When generating backend code, the file name under model will use this naming. |
Package | Package | Target package for generation | Required, automated code will be generated to the selected package, automatically filling enter.go and other files |
Business Database | BusinessDB | Select business database | Optional, if selected, the automatically generated global.GVA_DB will be replaced with global.MustGetGlobalDBByDBName(BusinessDb). |
Use GVA Structure | GvaModel | Use GVA structure | Recommended to select, if not selected, API table will not be automatically created, need to manually add corresponding routes in API management. |
Create Resource Identifier | AutoCreateResource | Create resource identifier | Optional, this feature needs to be used with organization management plugin from plugin market. |
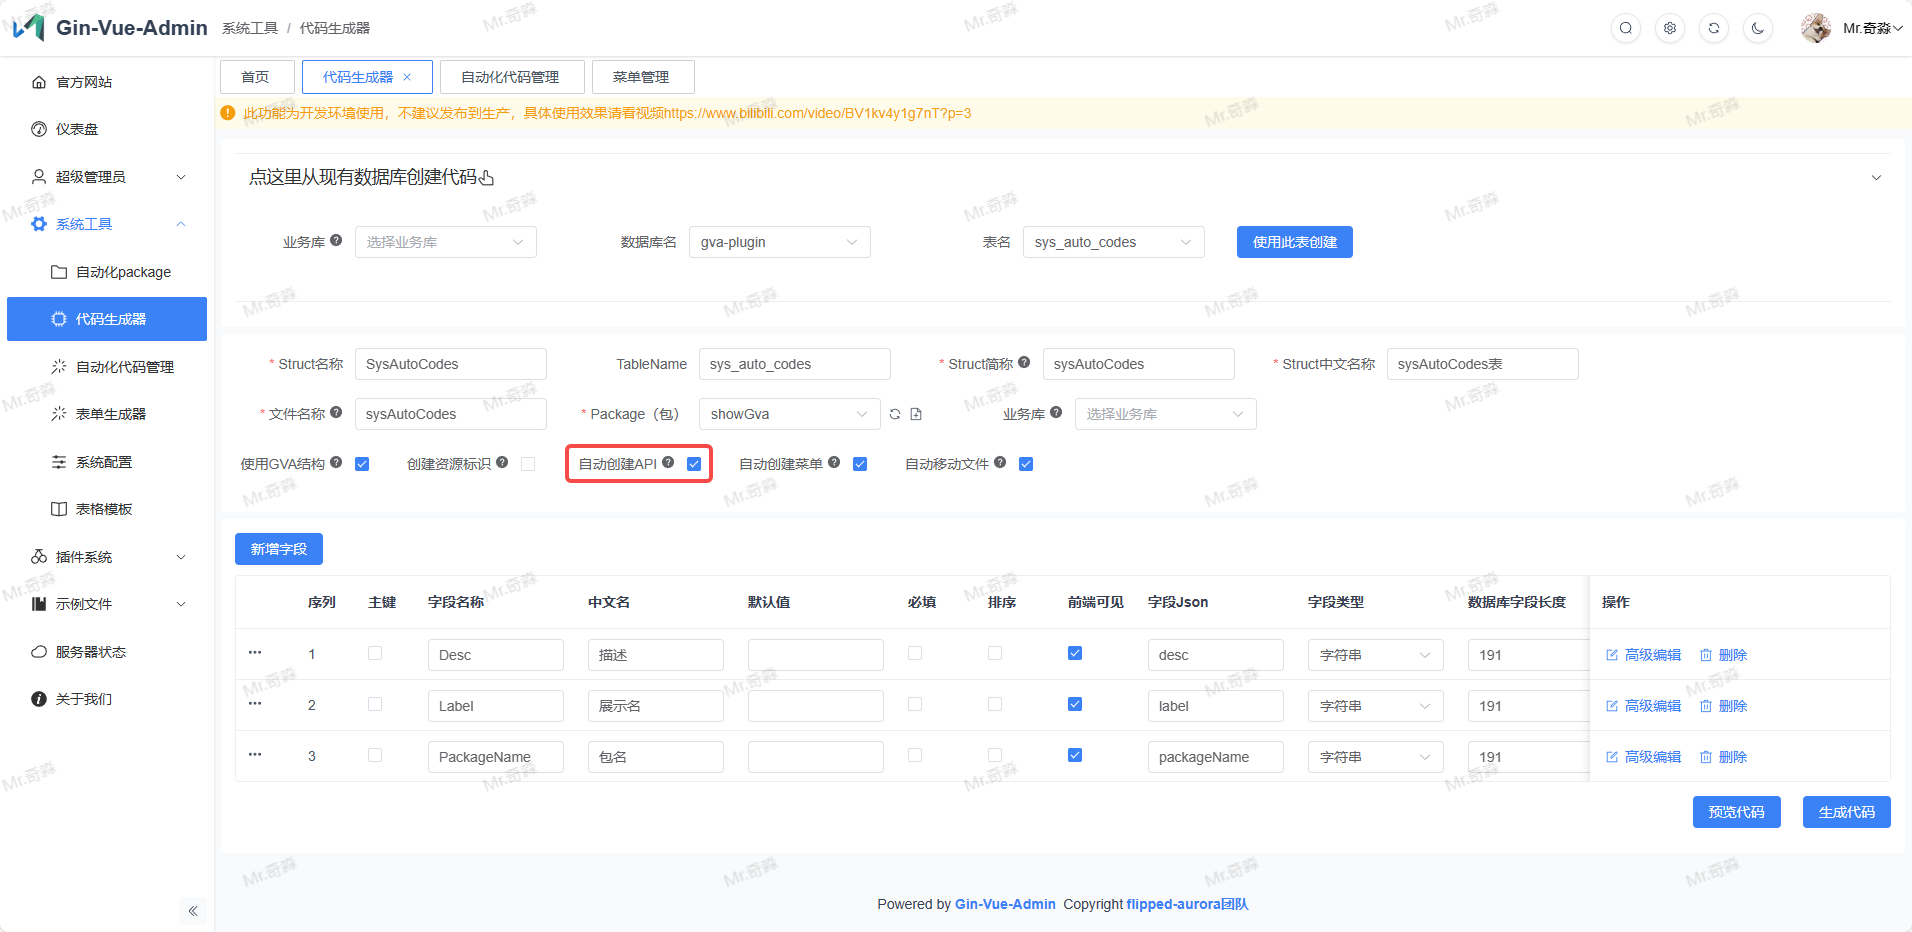
Auto Create API | AutoCreateApiToSql | Auto create API | Recommended to select, register automatically generated APIs into database. |
Auto Create Menu | AutoCreateMenuToSql | Auto create menu | Recommended to select, register automatically generated menus into database. |
Auto Move Files | AutoMoveFile | Auto move files | Recommended to select, automatically migrate generated files to corresponding positions configured in yaml. |
Field Interface Description

| Component Content Name | Corresponding Generated Struct Name | Description | Notes |
|---|---|---|---|
Field Name | FieldName | Struct name | Field name in struct, first letter uppercase |
Field Description | FieldDesc | Field description | Corresponds to comment field value in struct tag, also the table header name in data list display. |
FieldJSON | FieldJson | golang struct tag json | Corresponds to json field value in struct tag. When using struct object to call a field, use "object.json field value" |
Database Field Name | ColumnName | Database field name | Corresponds to field name in database |
Field Data Type | FieldType | Field corresponding golang data type | Corresponds to field type in struct |
Database Field Length | DataTypeLong | Field data type length | Corresponds to field length in generated data table |
Database Field Description | Comment | Database field description | Database field description, will generate frontend table header name and form label name based on this attribute |
Default Value | DefaultValue | Database field default value | When data is empty, database entry will automatically fill with DefaultValue |
Required | Require | Whether required | Automatically create frontend and backend required validation |
Validation Error Text | ErrorText | Required validation failure text | Required validation failure text |
Sortable | Sort | Whether sortable | Automatically create frontend and backend sorting code |
Frontend Visible | Front | Frontend visible | Whether frontend creates this field (commonly used for backend-only fields that don't need to be displayed to users) |
Primary Key | PrimaryKey | Database primary key | Database primary key, when not using gva default structure, this field will automatically become the main query field |
Clearable | Clearable | Clearable | Whether X appears on the right side of frontend input box allowing users to click to clear the field content |
Field Query Condition | FieldSearchType | Search type | Used to implement conditional queries for object data list |
Associated Dictionary | DictType | Associated dictionary marker | Associate an available dictionary from dictionary function for data operations, displayed as dropdown selection. |
Data Source Configuration | dataSource:{table,label,value} | Data source configuration | This function is used to generate an associated field, field is displayed as dropdown selection (single select) in frontend, field source depends on configuration content, data source table is the table for content retrieval, display field configuration will take this field from table for frontend dropdown display content, storage field will take this field from table for actual assignment value after selection |
1. Generate One-Step Code Package
1.1 Design Business Basic Struct Model
Click System Tools → Code Generator in the left menu
Fill in
Struct Name,TableName,Struct Abbreviation,Struct Description,File NamefieldsSelect
Auto Create APIandAuto Move FilesbuttonsClick Add Field button to create fields for data table and struct, see Field Interface Description for details.
1.2 Generate Struct from Database Table Selection
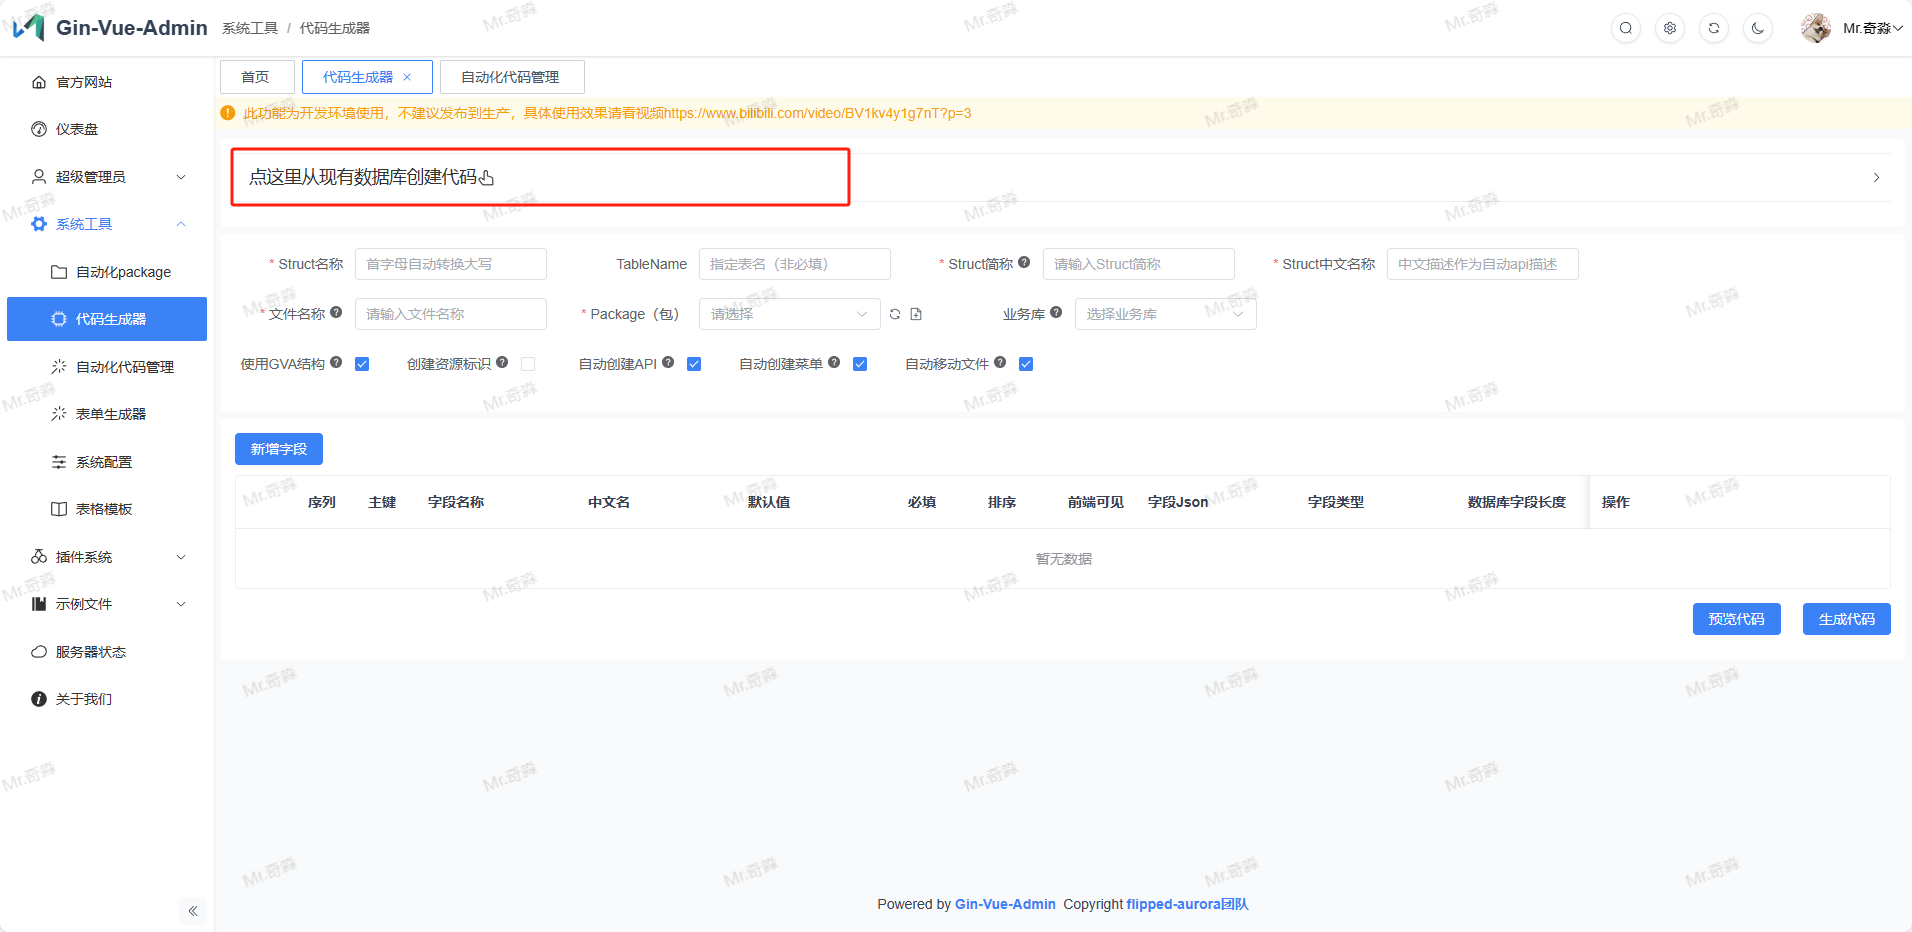
Click System Tools > Code Generator in the left menu, code generator is used to generate CRUD code.
Click Create code from existing database here
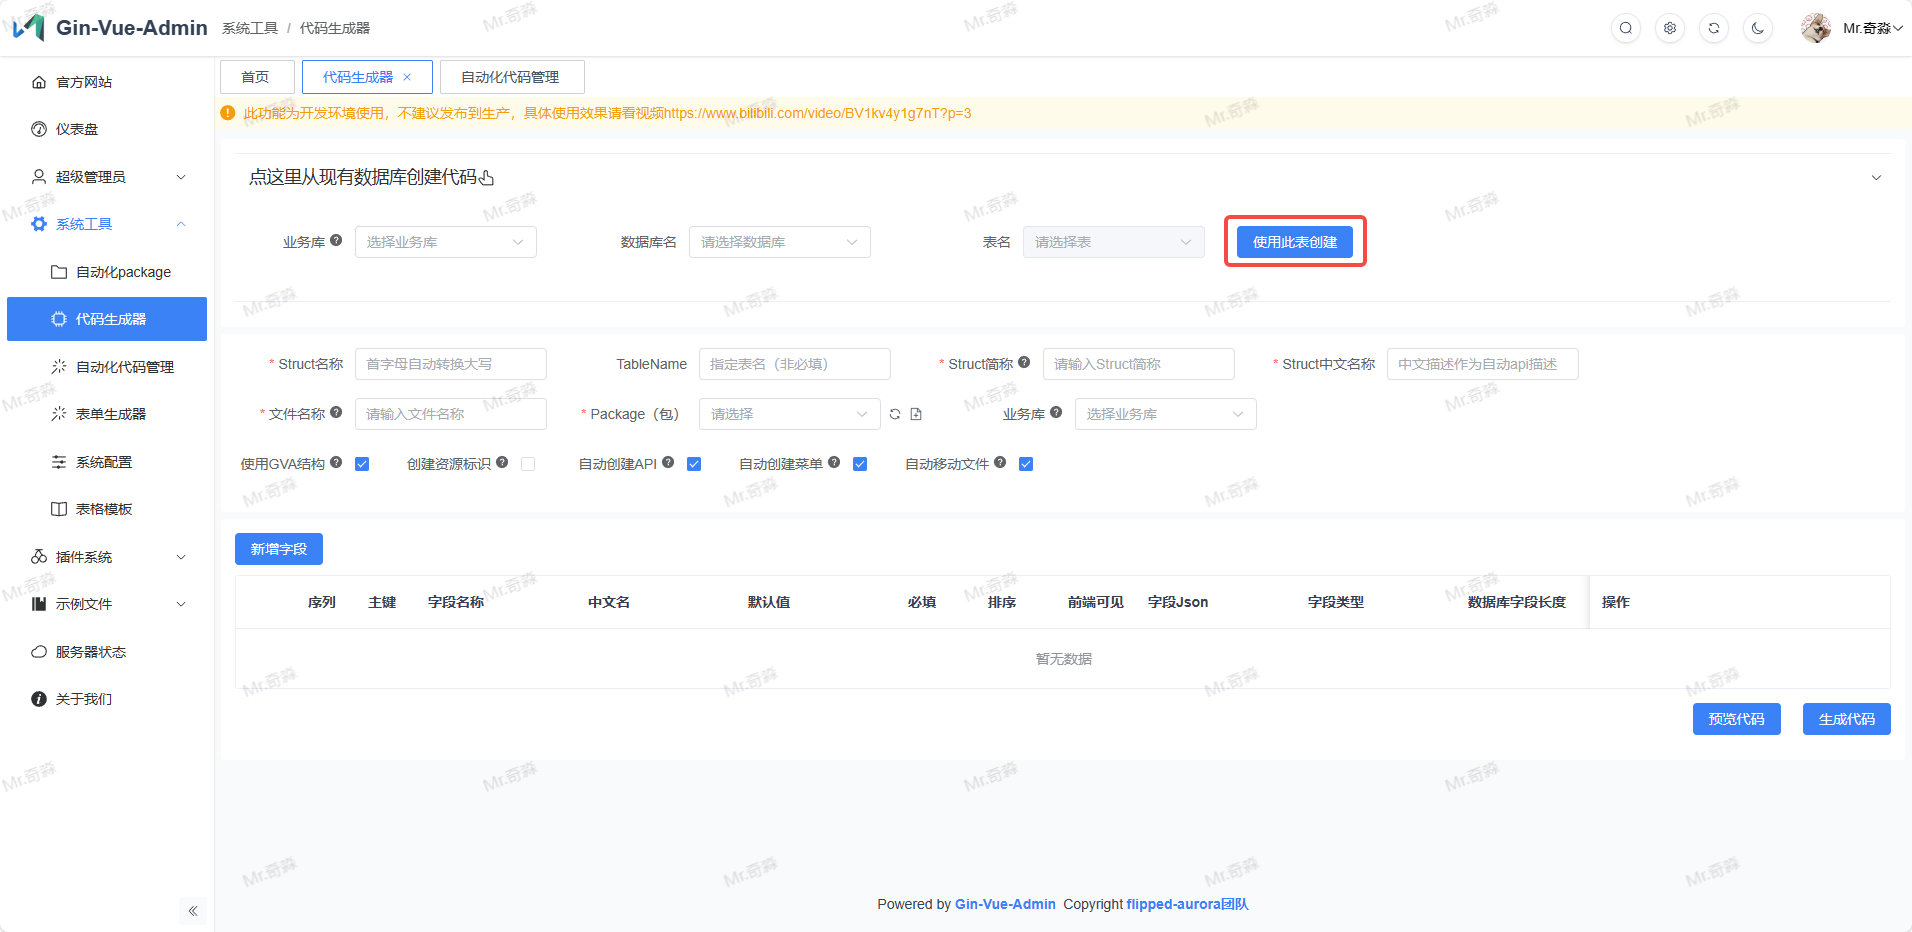
Select Database Name and Table Name
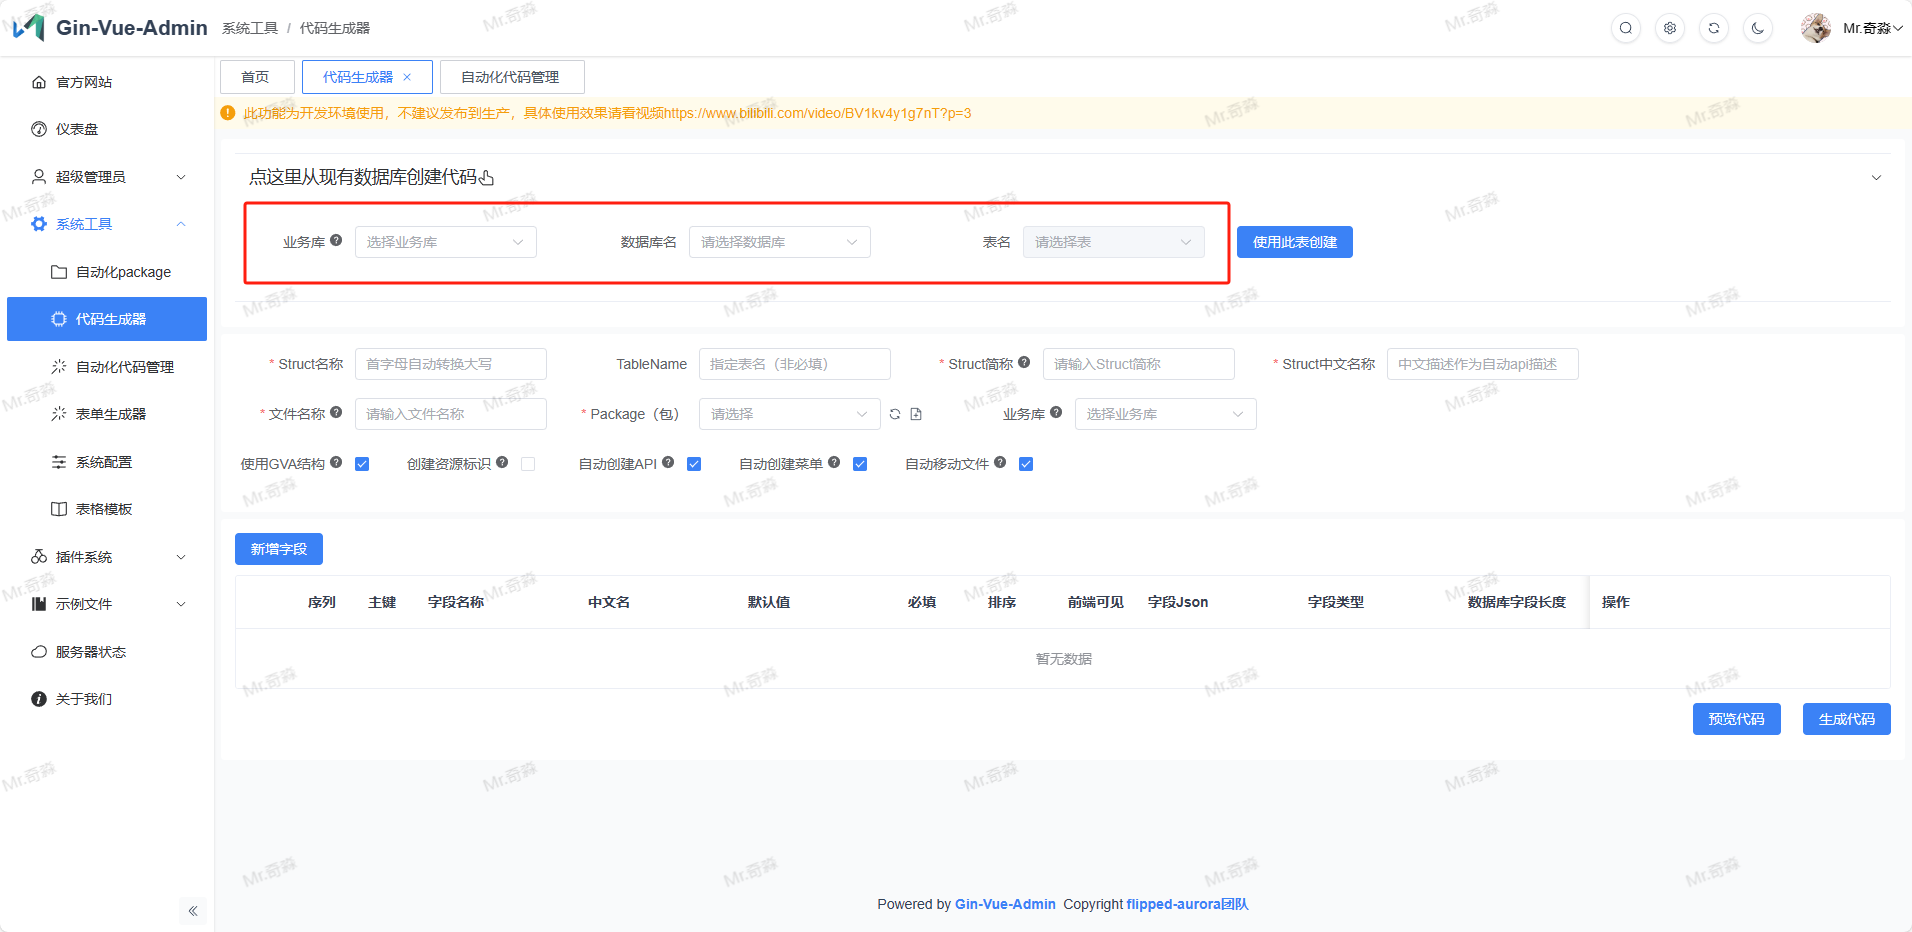
Click Use this table to create
Edit the required search conditions for each
Field, associated dictionaries, or other modifications you need to make by clicking edit.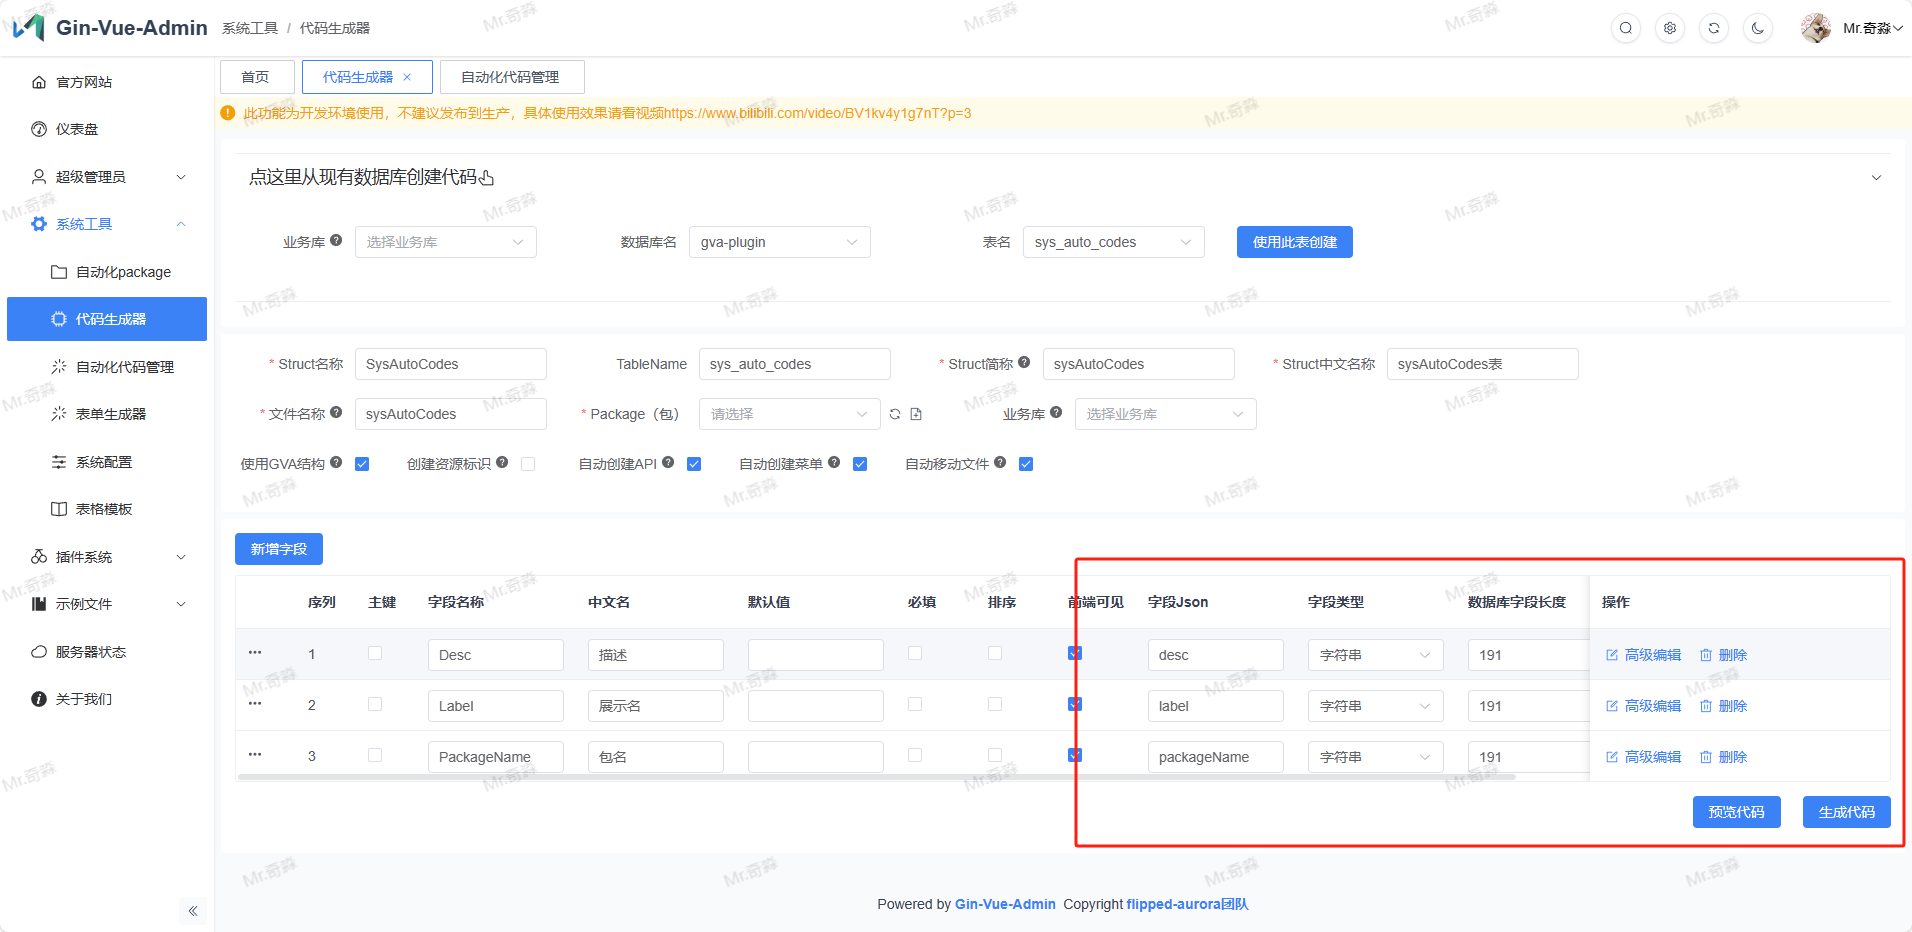
1.3 Click Generate Code Button
Note
Complete step 1.1 or 1.2 operation, one of them!
Code will automatically move to the package folder you created in both frontend and backend Frontend will move to /api/${packageName} and /view/${packageName} respectively Backend will move to /api/${packageName}, /service/${packageName}, /router/${packageName}, /model/${packageName} respectively
Tip
When creating automated code, enter.go will be automatically created. Below is an introduction about enter.go
enter.go internally unifies all structures under related functional modules into a total struct, then you can use new to instantiate all structures of this module uniformly. We only use the system category under api as an example here (other modules operate similarly, model module has no enter.go)
We use the system package as an example
enter.go
  sys_api.go
  sys_authority.go
  sys_auto_code.go
  sys_auto_code_history.go
  sys_captcha.go
  sys_casbin.go
  sys_dictionary.go
  sys_dictionary_detail.go
  sys_initdb.go
  sys_jwt_blacklist.go
  sys_menu.go
  sys_operation_record.go
  sys_system.go
  sys_user.go
enter.go The file contains the following structure
package system

import "github.com/flipped-aurora/gin-vue-admin/server/service"


// This is the grouping of functional modules, indicating that we are the API module, we summarize all structs in the current directory
type ApiGroup struct {
	DBApi	//This is the module that exists under the current group, DBApi module comes from type DBApi struct{} under sys_initdb.go, same below
	JwtApi
	BaseApi
	SystemApi
	CasbinApi
	AutoCodeApi
	SystemApiApi
	AuthorityApi
	DictionaryApi
	AuthorityMenuApi
	OperationRecordApi
	AutoCodeHistoryApi
	DictionaryDetailApi
}


// This is for unified and convenient use of Service functions, so unified acquisition is decomposed for convenience, all functions under api module can get corresponding Service instances by calling variables here and then call their methods
var (
	apiService              = service.ServiceGroupApp.SystemServiceGroup.ApiService
	// apiService: For example, this describes the ApiService related functions of the SystemServiceGroup functional group under the ServiceGroup instance under the service package
	jwtService              = service.ServiceGroupApp.SystemServiceGroup.JwtService
	menuService             = service.ServiceGroupApp.SystemServiceGroup.MenuService
	userService             = service.ServiceGroupApp.SystemServiceGroup.UserService
	initDBService           = service.ServiceGroupApp.SystemServiceGroup.InitDBService
	casbinService           = service.ServiceGroupApp.SystemServiceGroup.CasbinService
	autoCodeService         = service.ServiceGroupApp.SystemServiceGroup.AutoCodeService
	baseMenuService         = service.ServiceGroupApp.SystemServiceGroup.BaseMenuService
	authorityService        = service.ServiceGroupApp.SystemServiceGroup.AuthorityService
	dictionaryService       = service.ServiceGroupApp.SystemServiceGroup.DictionaryService
	systemConfigService     = service.ServiceGroupApp.SystemServiceGroup.SystemConfigService
	operationRecordService  = service.ServiceGroupApp.SystemServiceGroup.OperationRecordService
	autoCodeHistoryService  = service.ServiceGroupApp.SystemServiceGroup.AutoCodeHistoryService
	dictionaryDetailService = service.ServiceGroupApp.SystemServiceGroup.DictionaryDetailService
)
Here we have introduced the process of declaring enter and using enter from other packages, then we find the process of instantiating enter
Check the /server/api/v1/enter.go file
package v1

import (
	"github.com/flipped-aurora/gin-vue-admin/server/api/v1/autocode"
	"github.com/flipped-aurora/gin-vue-admin/server/api/v1/example"
	"github.com/flipped-aurora/gin-vue-admin/server/api/v1/system"
)

type ApiGroup struct {
	SystemApiGroup   system.ApiGroup
	ExampleApiGroup  example.ApiGroup
	AutoCodeApiGroup autocode.ApiGroup
}

// Here we summarize all the declarations made above and instantiate them as App. Other packages can be called through v1.ApiGroupApp.xxxxGroup.xxxFunction.xxxMethod
var ApiGroupApp = new(ApiGroup)
The method of manually adding automatically generated code is also introduced. This mode is convenient for modular use. It looks long, but it facilitates unified management of single categories, creating unified methods, etc., and also facilitates project expansion and maintenance in the later stage. It won't be painful in subsequent iterations.
1.4 Preview Code
Note
This function requires version v2.3.9 or later, not including v2.3.9!
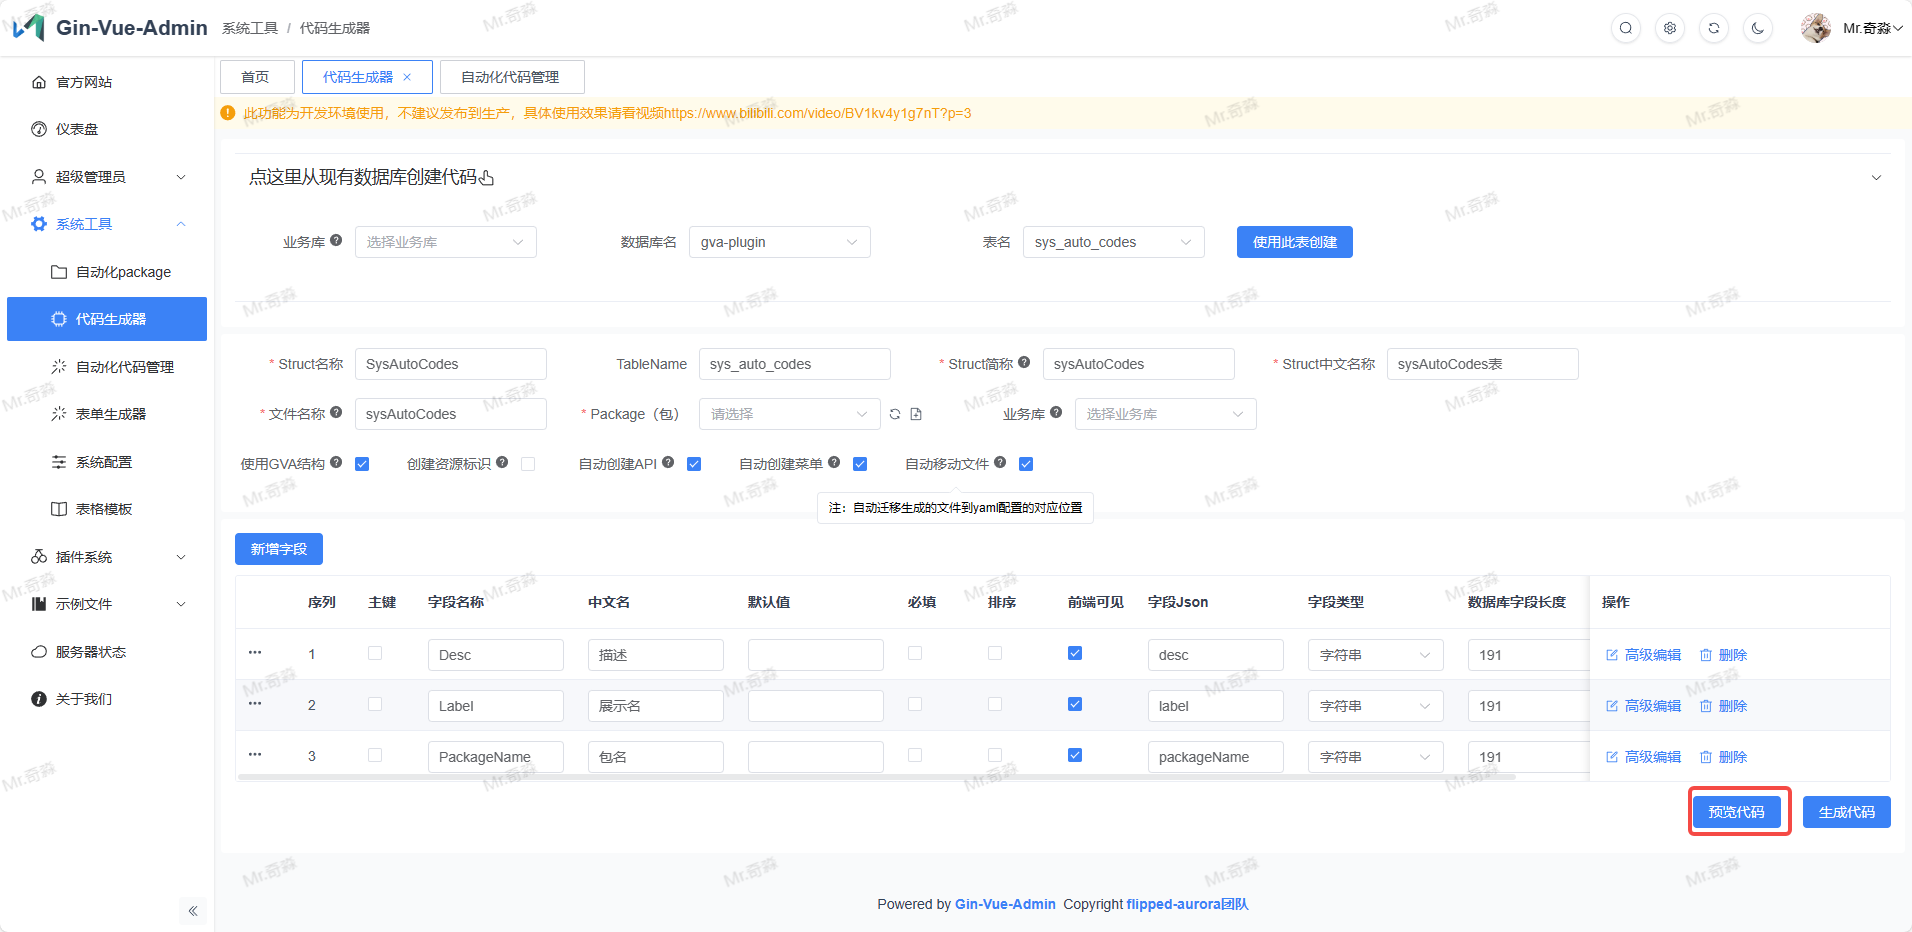
Effect Preview

2. Register Routes and Database Tables
2.1 Register Routes (Current version can be added automatically)
package initialize

import (
	_ "gin-vue-admin/docs"
	"gin-vue-admin/global"
	"gin-vue-admin/middleware"
	"gin-vue-admin/router"
	"github.com/gin-gonic/gin"
	"github.com/swaggo/gin-swagger"
	"github.com/swaggo/gin-swagger/swaggerFiles"
	"net/http"
)

// Initialize the main router

func Routers() *gin.Engine {
	Router := gin.Default()

	// If you want to use the frontend webpage without nginx proxy, you can modify web/.env.production
	// VUE_APP_BASE_API = /
	// VUE_APP_BASE_PATH = http://localhost
	// Then execute the build command npm run build. Uncomment the following 4 lines
	// Router.LoadHTMLGlob("./dist/*.html") // npm package path for dist
	// Router.Static("/favicon.ico", "./dist/favicon.ico")
	// Router.Static("/static", "./dist/assets")   // Static resources inside dist
	// Router.StaticFile("/", "./dist/index.html") // Frontend webpage entry point

	Router.StaticFS(global.GVA_CONFIG.Local.Path, http.Dir(global.GVA_CONFIG.Local.Path)) // Provide static addresses for user avatars and files
	// Router.Use(middleware.LoadTls())  // Enable HTTPS
	global.GVA_LOG.Info("use middleware logger")
	// Cross-domain, if cross-domain is needed, you can uncomment the following
	// Router.Use(middleware.Cors()) // Allow all cross-domain requests
	//Router.Use(middleware.CorsByRules()) // Allow cross-domain requests according to configured rules
	global.GVA_LOG.Info("use middleware cors")
	Router.GET("/swagger/*any", ginSwagger.WrapHandler(swaggerFiles.Handler))
	global.GVA_LOG.Info("register swagger handler")
	// Convenient for unified route group prefix addition for multi-server deployment

	// Get route group instances
	systemRouter := router.RouterGroupApp.System
	exampleRouter := router.RouterGroupApp.Example
	autocodeRouter := router.RouterGroupApp.Autocode
	// From router's enter.go
	PublicGroup := Router.Group("")
	{
		// Health check
		PublicGroup.GET("/health", func(c *gin.Context) {
			c.JSON(200, "ok")
		})
	}
	{
		systemRouter.InitBaseRouter(PublicGroup) // Register basic function routes without authentication
		systemRouter.InitInitRouter(PublicGroup) // Auto initialization related
	}
	PrivateGroup := Router.Group("")
	PrivateGroup.Use(middleware.JWTAuth()).Use(middleware.CasbinHandler())
	{
		systemRouter.InitApiRouter(PrivateGroup)                 // Register function API routes
		systemRouter.InitJwtRouter(PrivateGroup)                 // JWT related routes
		systemRouter.InitUserRouter(PrivateGroup)                // Register user routes
		systemRouter.InitMenuRouter(PrivateGroup)                // Register menu routes
		systemRouter.InitSystemRouter(PrivateGroup)              // System related routes
		systemRouter.InitCasbinRouter(PrivateGroup)              // Permission related routes
		systemRouter.InitAutoCodeRouter(PrivateGroup)            // Create automated code
		systemRouter.InitAuthorityRouter(PrivateGroup)           // Register role routes
		systemRouter.InitSysDictionaryRouter(PrivateGroup)       // 字典管理
		systemRouter.InitAutoCodeHistoryRouter(PrivateGroup)     // 自动化代码历史
		systemRouter.InitSysOperationRecordRouter(PrivateGroup)  // 操作记录
		systemRouter.InitSysDictionaryDetailRouter(PrivateGroup) // 字典详情管理

		exampleRouter.InitExcelRouter(PrivateGroup)                 // 表格导入导出
		exampleRouter.InitCustomerRouter(PrivateGroup)              // 客户路由
		exampleRouter.InitFileUploadAndDownloadRouter(PrivateGroup) // 文件上传下载功能路由

		// Code generated by github.com/flipped-aurora/gin-vue-admin/server Begin; DO NOT EDIT.
		autocodeRouter.InitSysAutoCodeExampleRouter(PrivateGroup)
		// Code generated by github.com/flipped-aurora/gin-vue-admin/server End; DO NOT EDIT.
	}

	InstallPlugin(PublicGroup, PrivateGroup) // 安装插件

	global.GVA_LOG.Info("router register success")
	return Router
}
2.2 Register Database Tables (Current version can be added automatically)
Configure your model structure into db.AutoMigrate() internally
package initialize

import (
	"os"

	"github.com/flipped-aurora/gin-vue-admin/server/global"
	"github.com/flipped-aurora/gin-vue-admin/server/model/autocode"
	"github.com/flipped-aurora/gin-vue-admin/server/model/example"
	"github.com/flipped-aurora/gin-vue-admin/server/model/system"

	"go.uber.org/zap"
	"gorm.io/gorm"
)

// Gorm 初始化数据库并产生数据库全局变量
// Author SliverHorn
func Gorm() *gorm.DB {
	switch global.GVA_CONFIG.System.DbType {
	case "mysql":
		return GormMysql()
	case "pgsql":
		return GormPgSql()
	default:
		return GormMysql()
	}
}

// RegisterTables 注册数据库表专用
// Author SliverHorn
func RegisterTables(db *gorm.DB) {
	err := db.AutoMigrate(
		// 系统模块表
		system.SysApi{},
		system.SysUser{},
		system.SysBaseMenu{},
		system.JwtBlacklist{},
		system.SysAuthority{},
		system.SysDictionary{},
		system.SysOperationRecord{},
		system.SysAutoCodeHistory{},
		system.SysDictionaryDetail{},
		system.SysBaseMenuParameter{},

		// 示例模块表
		example.ExaFile{},
		example.ExaCustomer{},
		example.ExaFileChunk{},
		example.ExaFileUploadAndDownload{},

		// 自动化模块表
		// Code generated by github.com/flipped-aurora/gin-vue-admin/server Begin; DO NOT EDIT.
		autocode.AutoCodeExample{},
		// Code generated by github.com/flipped-aurora/gin-vue-admin/server End; DO NOT EDIT.
	)
	if err != nil {
		global.GVA_LOG.Error("register table failed", zap.Error(err))
		os.Exit(0)
	}
	global.GVA_LOG.Info("register table success")
}
3. Configure Directory Menu

Enter the system Super Administrator → Menu Management menu, click Add Root Menu button to configure menu information.
- Route name: Corresponds to the access path when entering the list display page
- Route path: Can only be entered after selecting "Add Parameters" behind it, corresponds to the parameters after the access path when entering the list display page, see video for specific usage
- Hidden: Whether to hide this directory menu when displaying the system left directory menu
- Parent Node Id: The parent directory menu of this directory menu. This is automatically filled data, no need to operate manually
- File Path: Corresponds to /view/ PackageName (self-built)/StructName.vue file in the frontend project
- Display Name: The name displayed in the system left directory menu for this directory menu
- Icon: The icon displayed in the system left directory menu for this directory menu
- Sort Mark: Used to adjust the up and down position of this directory menu in the system left directory menu
- keepAlive: Whether to use keepAlive cache
After configuring the above, click Confirm button to complete menu configuration.
4. Configure Backend Interface
If Auto Create API is checked in the first step, you can skip this step
If it's your own business code, you need to configure the backend interface here. Enter the system Super Administrator → API Management menu, click Add API button to configure interface information.
Note
If you don't know how to write it, you can look at the code
//@author: [piexlmax](https://github.com/piexlmax)
//@author: [SliverHorn](https://github.com/SliverHorn)
//@function: CreateApi
//@description: 自动创建api数据,
//@param: a *model.AutoCodeStruct
//@return: error

func AutoCreateApi(a *model.AutoCodeStruct) (err error) {
	var apiList = []model.SysApi{
		{
			Path:        "/" + a.Abbreviation + "/" + "create" + a.StructName,
			Description: "新增" + a.Description,
			ApiGroup:    a.Abbreviation,
			Method:      "POST",
		},
		{
			Path:        "/" + a.Abbreviation + "/" + "delete" + a.StructName,
			Description: "删除" + a.Description,
			ApiGroup:    a.Abbreviation,
			Method:      "DELETE",
		},
		{
			Path:        "/" + a.Abbreviation + "/" + "delete" + a.StructName + "ByIds",
			Description: "批量删除" + a.Description,
			ApiGroup:    a.Abbreviation,
			Method:      "DELETE",
		},
		{
			Path:        "/" + a.Abbreviation + "/" + "update" + a.StructName,
			Description: "更新" + a.Description,
			ApiGroup:    a.Abbreviation,
			Method:      "PUT",
		},
		{
			Path:        "/" + a.Abbreviation + "/" + "find" + a.StructName,
			Description: "Get by ID" + a.Description,
			ApiGroup:    a.Abbreviation,
			Method:      "GET",
		},
		{
			Path:        "/" + a.Abbreviation + "/" + "get" + a.StructName + "List",
			Description: "获取" + a.Description + "列表",
			ApiGroup:    a.Abbreviation,
			Method:      "GET",
		},
	}
	err = global.GVA_DB.Transaction(func(tx *gorm.DB) error {
		for _, v := range apiList {
			var api model.SysApi
			if errors.Is(tx.Where("path = ? AND method = ?", v.Path, v.Method).First(&api).Error, gorm.ErrRecordNotFound) {
				if err := tx.Create(&v).Error; err != nil { // 遇到错误时回滚事务
					return err
				}
			}
		}
		return nil
	})
	return err
}- Path: Interface path, such as the url in each method in src → api → PackageName.js in the frontend project
- Request: Select according to the actual interface
- API Group: Corresponds to struct abbreviation
- API Description: Brief description of the API
After configuring the above, click Confirm button to complete interface configuration.
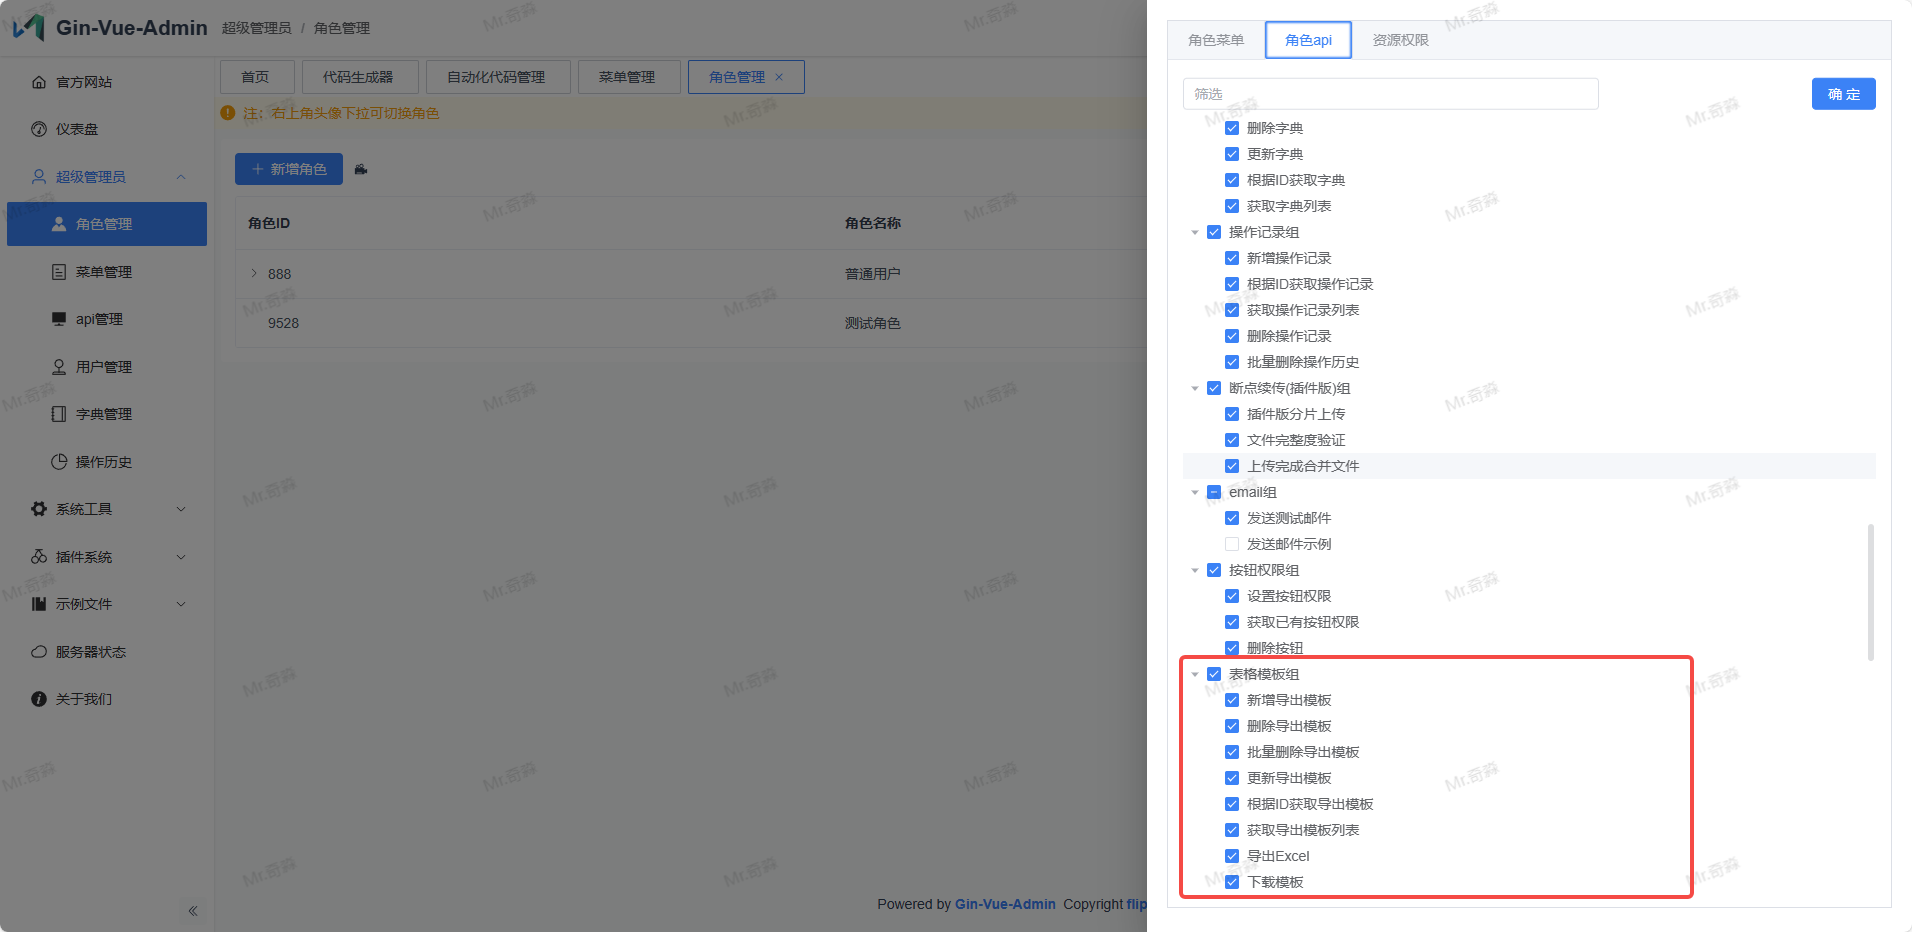
5. Configure Role Permissions
Enter the system Super Administrator → Role Management menu, find the role that needs to set permissions, click the corresponding Set Permissions button to configure role-related permissions.
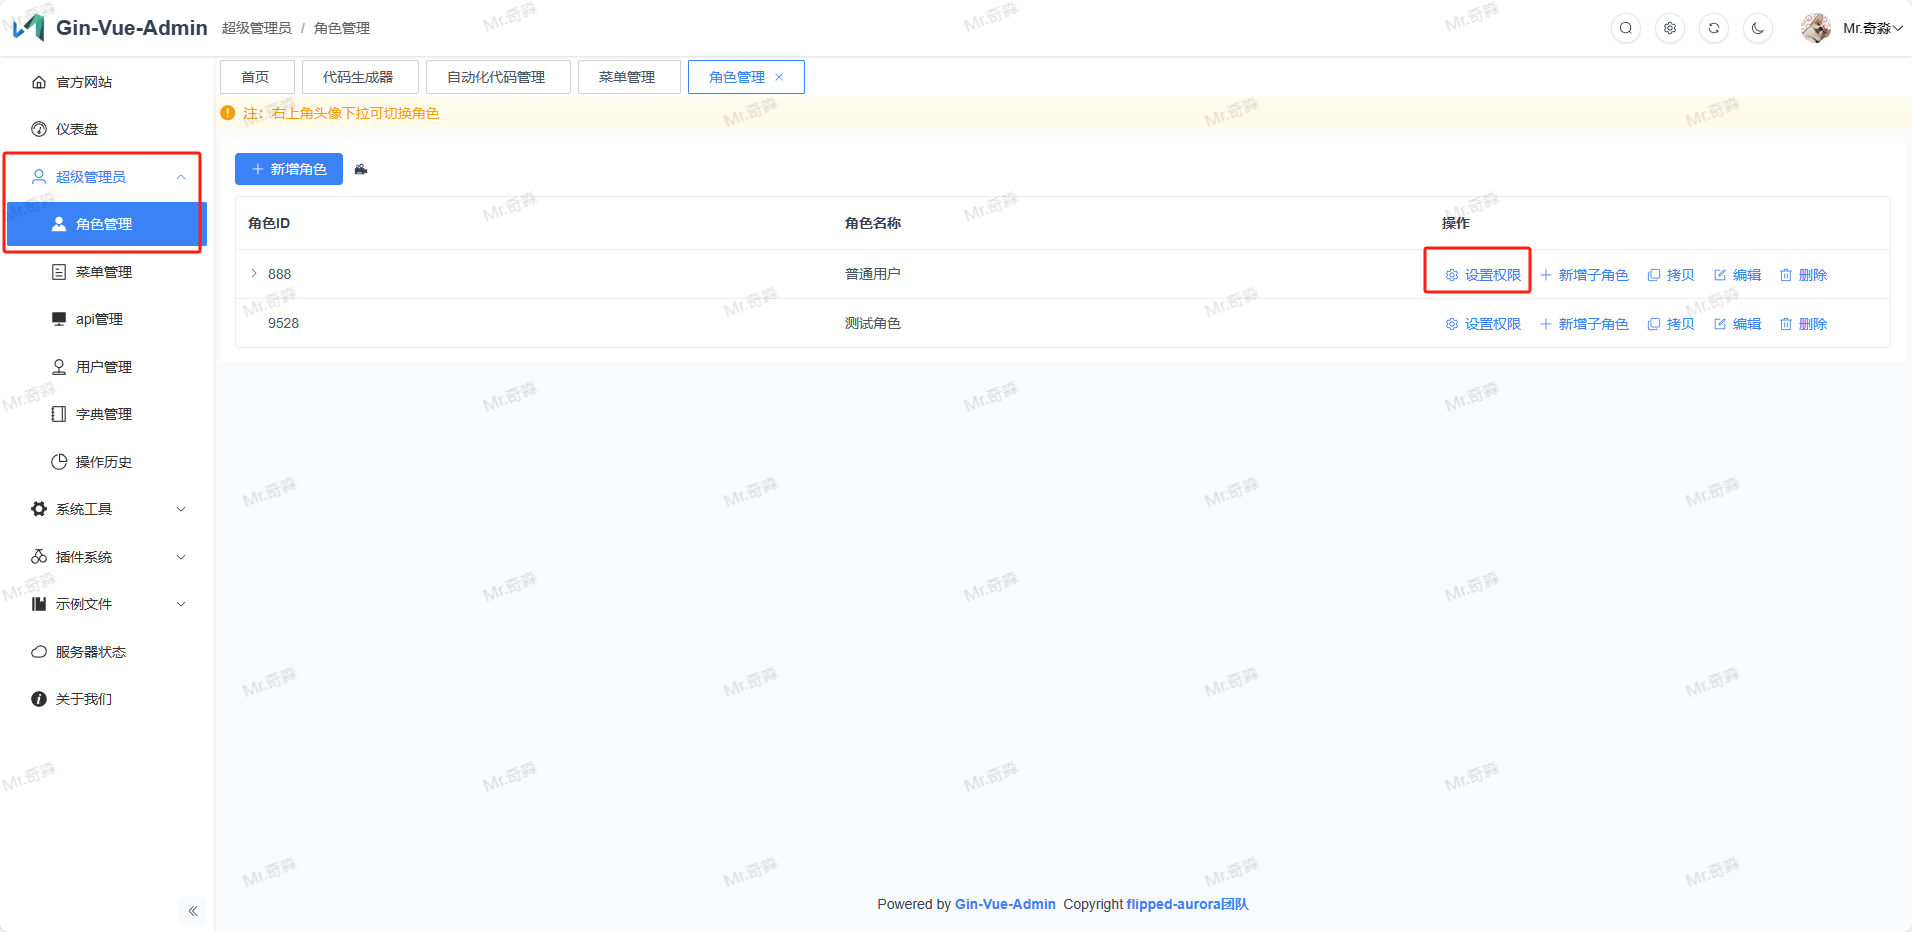
Role Menu: Check the directory menus that this role can access
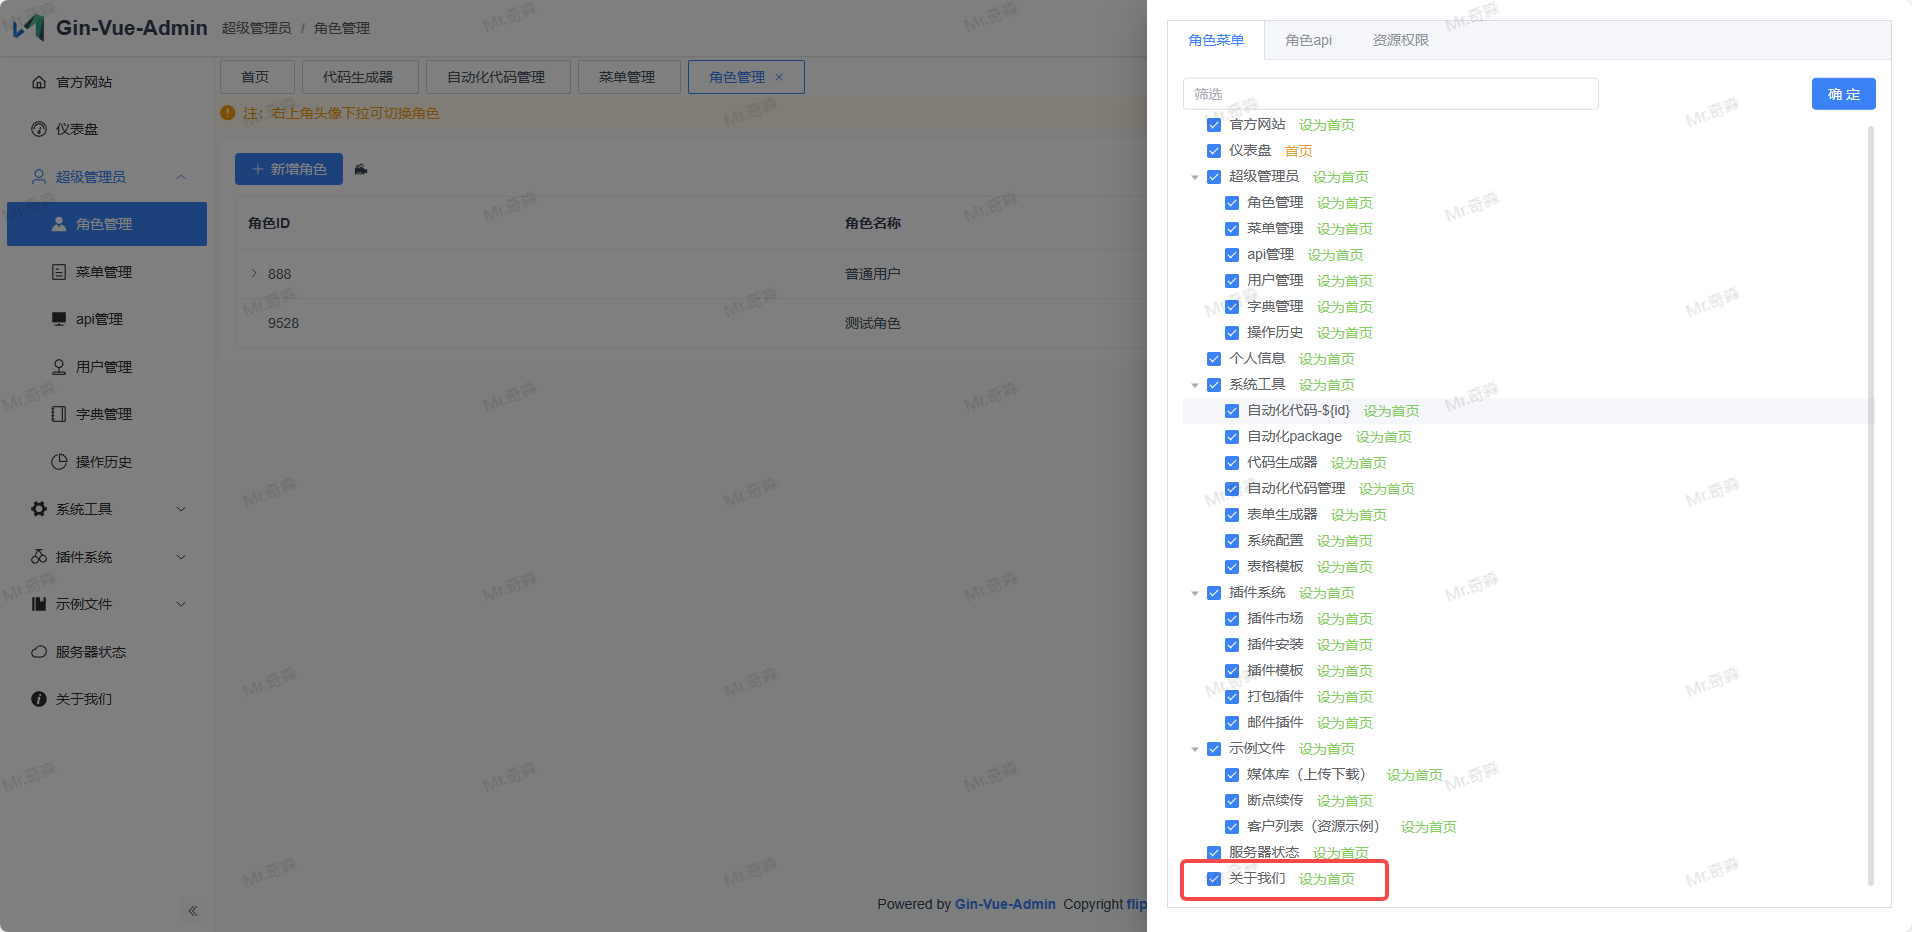
Role API: Check the interfaces that this role can access
6: Complete Add Form Popup/Page
Note
After v2.3.5 version, manual form creation is no longer needed. If you want to define forms yourself, you can take a look!
After completing the above 6 steps, we can see the struct data list page we created in the system. Currently, this page can already implement delete and query functions. Add and modify functions still need us to complete the popup form ourselves.
Enter the system System Tools → Form Generator menu, drag the left components to the middle canvas area according to your actual needs, and set component properties on the right.
- Component Type: Default is the component type selected on the left, can be adjusted here
- Field Name: Corresponds to FieldJSON field in Step 3
- Title: Component label
- Placeholder: Just placeholder
After filling in the basic component properties above for all components, click the Copy Code button above the canvas, a popup will appear letting us choose Generation Type as page or popup. I chose page when using it, the specific content should be the same, choosing which one shouldn't affect our current needs. Then click Confirm button to successfully copy our form code.
Next,
- Find any notepad or place to copy the code into.
- In the copied code, extract the
<el-form>……</el-form>part code, replace the sentence此处请使用表单生成器生成form填充 表单默认绑定 formData 如手动修改过请自行修改keyin the frontend project src → view → PackageName(self-built) → StructName.vue file. - In the copied code, copy the object returned in the
datamethod of the js part to the frontend project, in thereturnobject of thedatamethod in the js part of the .vue file mentioned above
Finish
At this point, a single table basic business struct data list display, single table data add, delete, find, update functions are all complete.